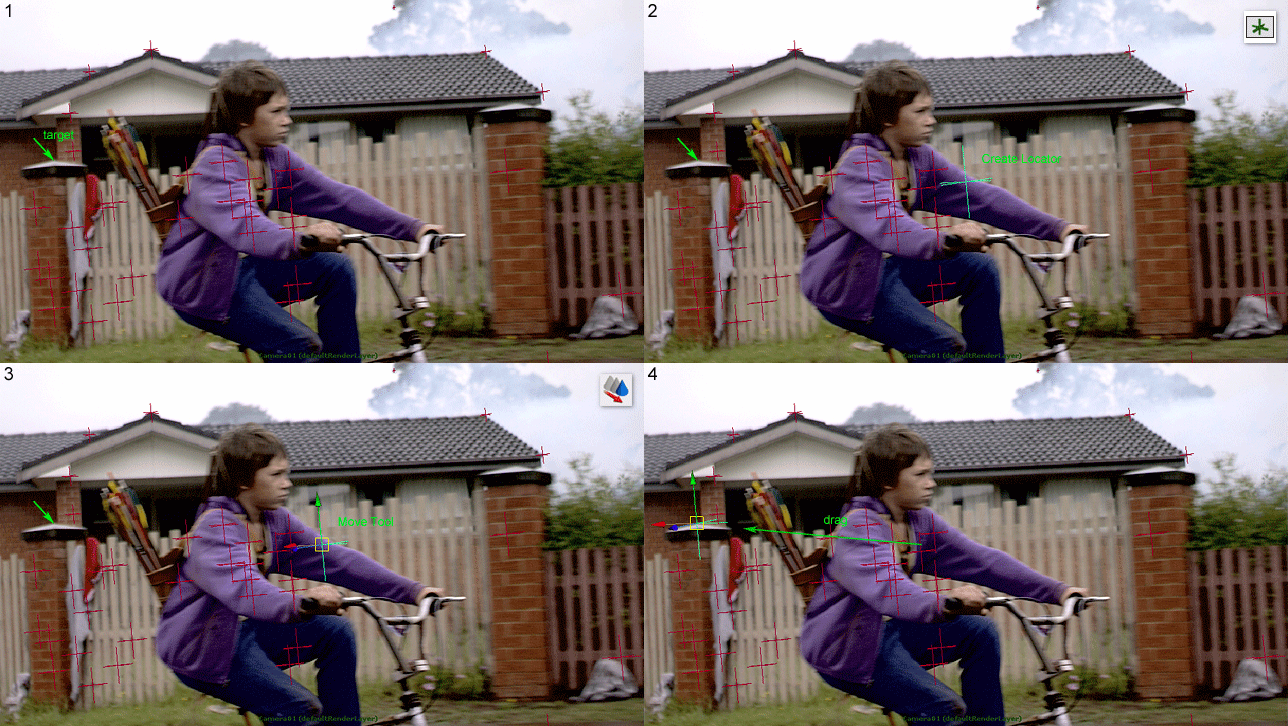
When you're creating geometry for a tracked camera, it's useful to be able to use a calculated point cloud as a basis for the placement of the geometry. If you know what I'm talking about, you probably ran into the problem once of needing additional points in 3D space, that were not in the point cloud that came with the camera track. While most tracking software has good options for solving additional trackers after you've solved a camera, this is generally not what you want to do... It could be the shot is already handed over to 3D or compositing for example, or that the features you need the 3D position for are very difficult to track, covered by something for a big part of the shot, or many in number (and therefore time-consuming).
Because I like to do most of my geometry reconstruction in Maya, I use a simple but very powerful trick to work out the 3D position of any point in 3D space, for which you only need a camera track and 2 frames where the same feature is clearly seen from a different angle.
How to determine the X and Y positions of an image feature in camera space
HOW DOES IT WORK?
When you work in Maya, download and install the Python scripts I wrote to simplify the workflow and keep focus on the tracked camera view during all steps [mdg_matchmoveScripts_v0.1.zip]
Choose the feature you need the 3D position for, move the Playhead to a frame where it's clearly visible and change the Viewport focus on the tracked Camera Pane,
Having the Viewport focus set correctly is important for the scripts below to work as expected.
Click the 'autoPlaceLocator' shelf button to create a Locator in the center of the tracked Camera Pane,
You can also use a standard Locator (or Null), but with the 'mdg_autoPlaceLocator' script you never have to look for the Locator when the origin is outside the tracked camera view. The script also takes all ingoing transform nodes on the tracked camera node into account.
Select the Move Tool or press w,
MMB drag the Locator to the feature (in the plate) for which you need the 3D position,
Because you are looking through the tracked camera, this determines the X and Y positions of the Locator in camera space, leaving the Z position unknown.
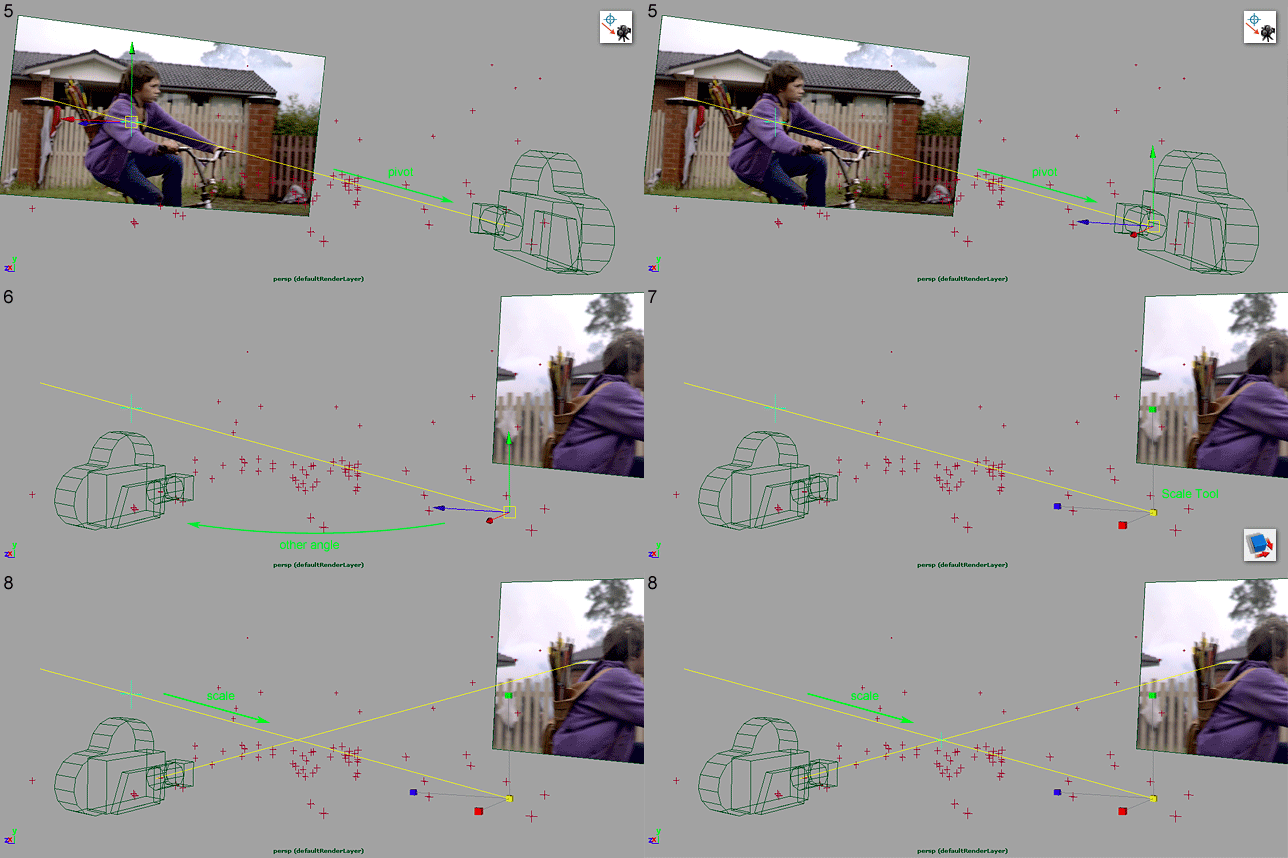
Click the 'movePivotToViewportCamera' shelf button, to move the Locator pivot to the position of the tracked camera in 3D space,
You can also do this with the standard Maya functionality by looking for the Locator and tracked camera in another perspective view, but with the ‘mdg_movePivotToViewportCamera’ script you never have to leave the tracked camera view.
Move the Playhead to a frame where the feature is clearly visible from another angle,
Select the Scale Tool or press r,
MMB drag or use the Channel Box to change scale values until the Locator matches the feature again (while leaving scale values equal for x, y and z),
Basically steps 4 and 5 determine that the position of the Locator should be somewhere on a line in 3D space. By scaling the Locator with its pivot on the first camera position, you can move it along that line. Looking at the feature (and the line it should be on) from a clearly different angle, makes it possible to work out where on that line the Locator should be exactly.
Move the Playhead to check the accuracy of the 3D position, and fine tune scale values if needed.
How to work out the missing Z dimension of the image feature position by using a second camera angle
Finally the obvious should be stated, that this technique only works on shots with parallax, and that it's accuracy is largely dependent on the accuracy of the camera track. Also note that while I explained my workflow in Maya here, none of the steps are really specific to Maya and can be applied in any other 3D or compositing software. In Nuke for example the "PointsTo3D" node does a similar thing.

