Since I’ve started experimenting with Houdini in 2019, I mainly focused on procedural modeling tools and using Houdini together with Unreal Engine. To lower the threshold for also using Houdini’s simulation features, I thought it was time this year to get a proper intro to Houdini FX. So I signed up for Corbin Mayne’s “Houdini Fundamentals” course in the Winter 2023 term at Rebelway. This 10-week course teaches the basics of volumes, particles, pyro, flip fluids, rigid body dynamics, grains, vellum, oceans, lighting and rendering.
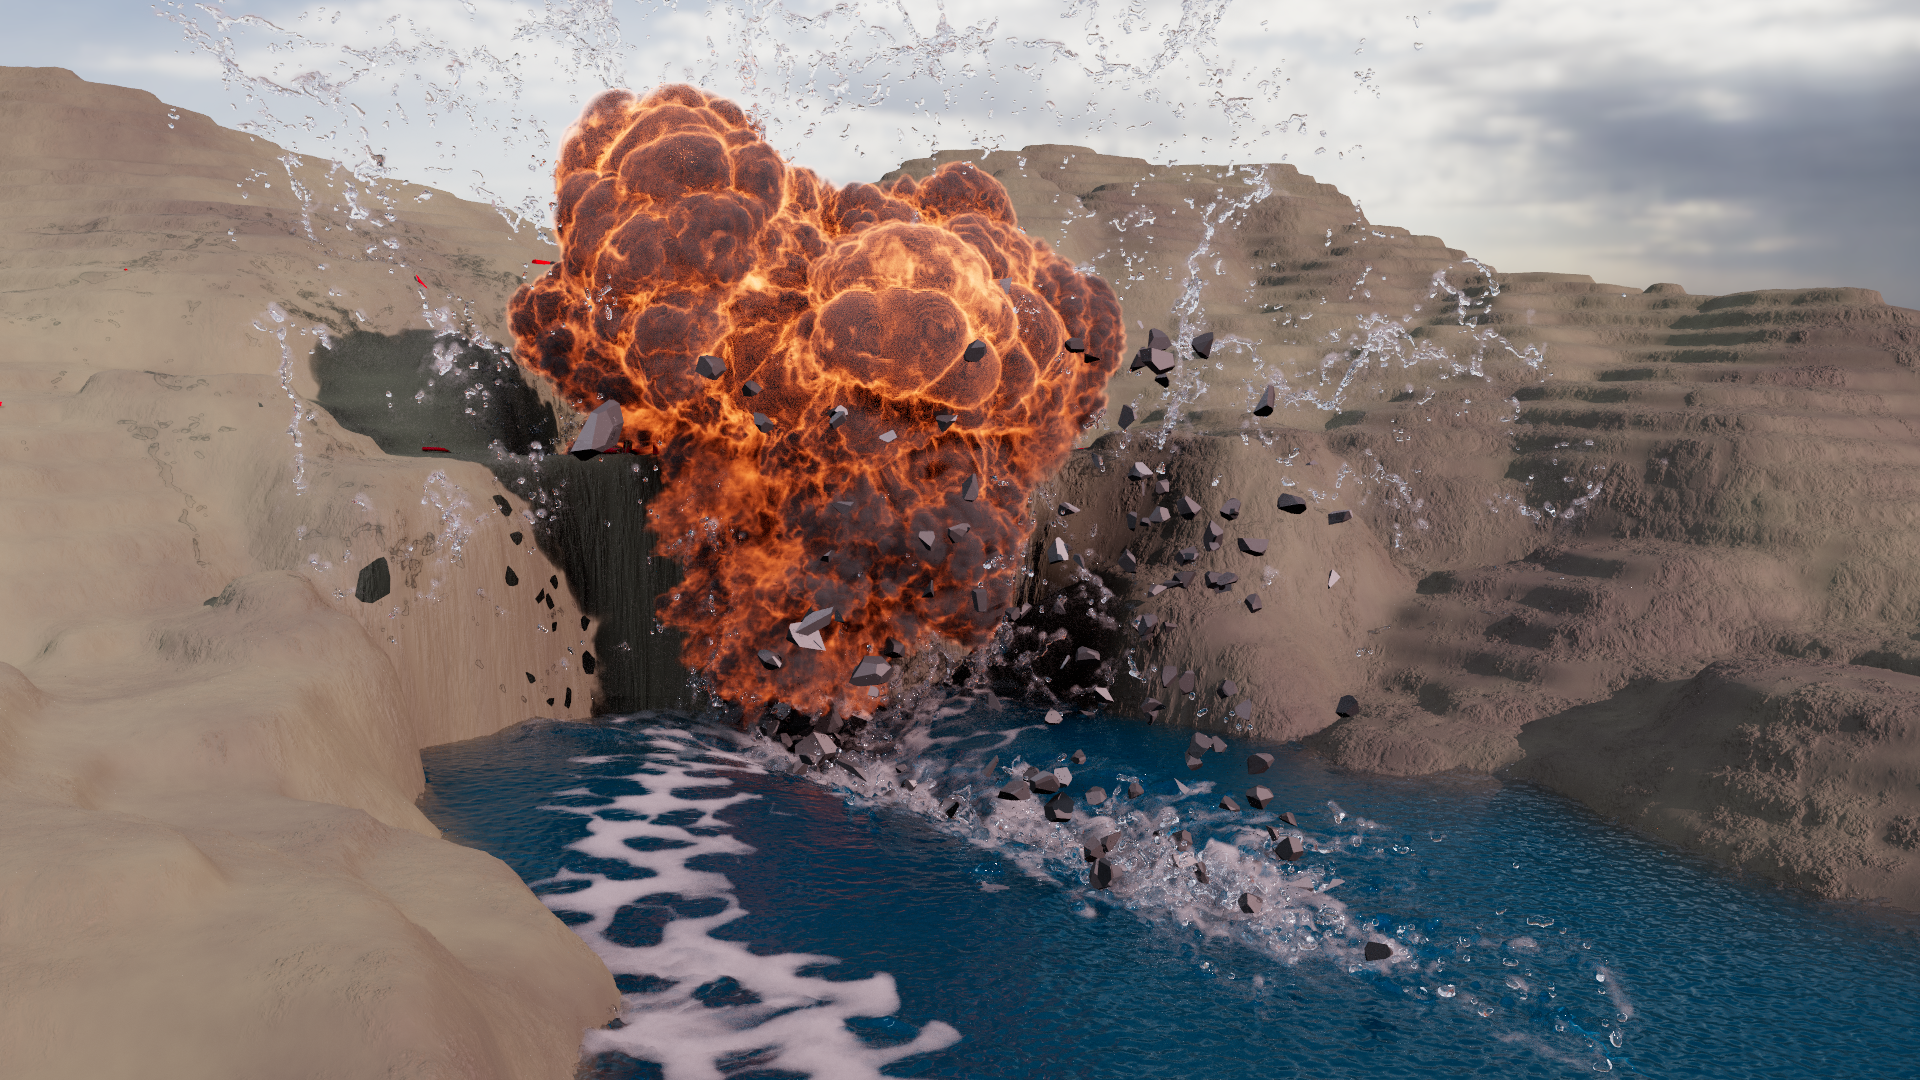
For the final project for this course we had to blow up some kind of dam with a combination of particle-, pyro-, flip- and rbd-simulations. I created the dam and bridge destruction shown in the video below. This post gives a quick overview of the stages I went through for setting up this simulation.
MODELING
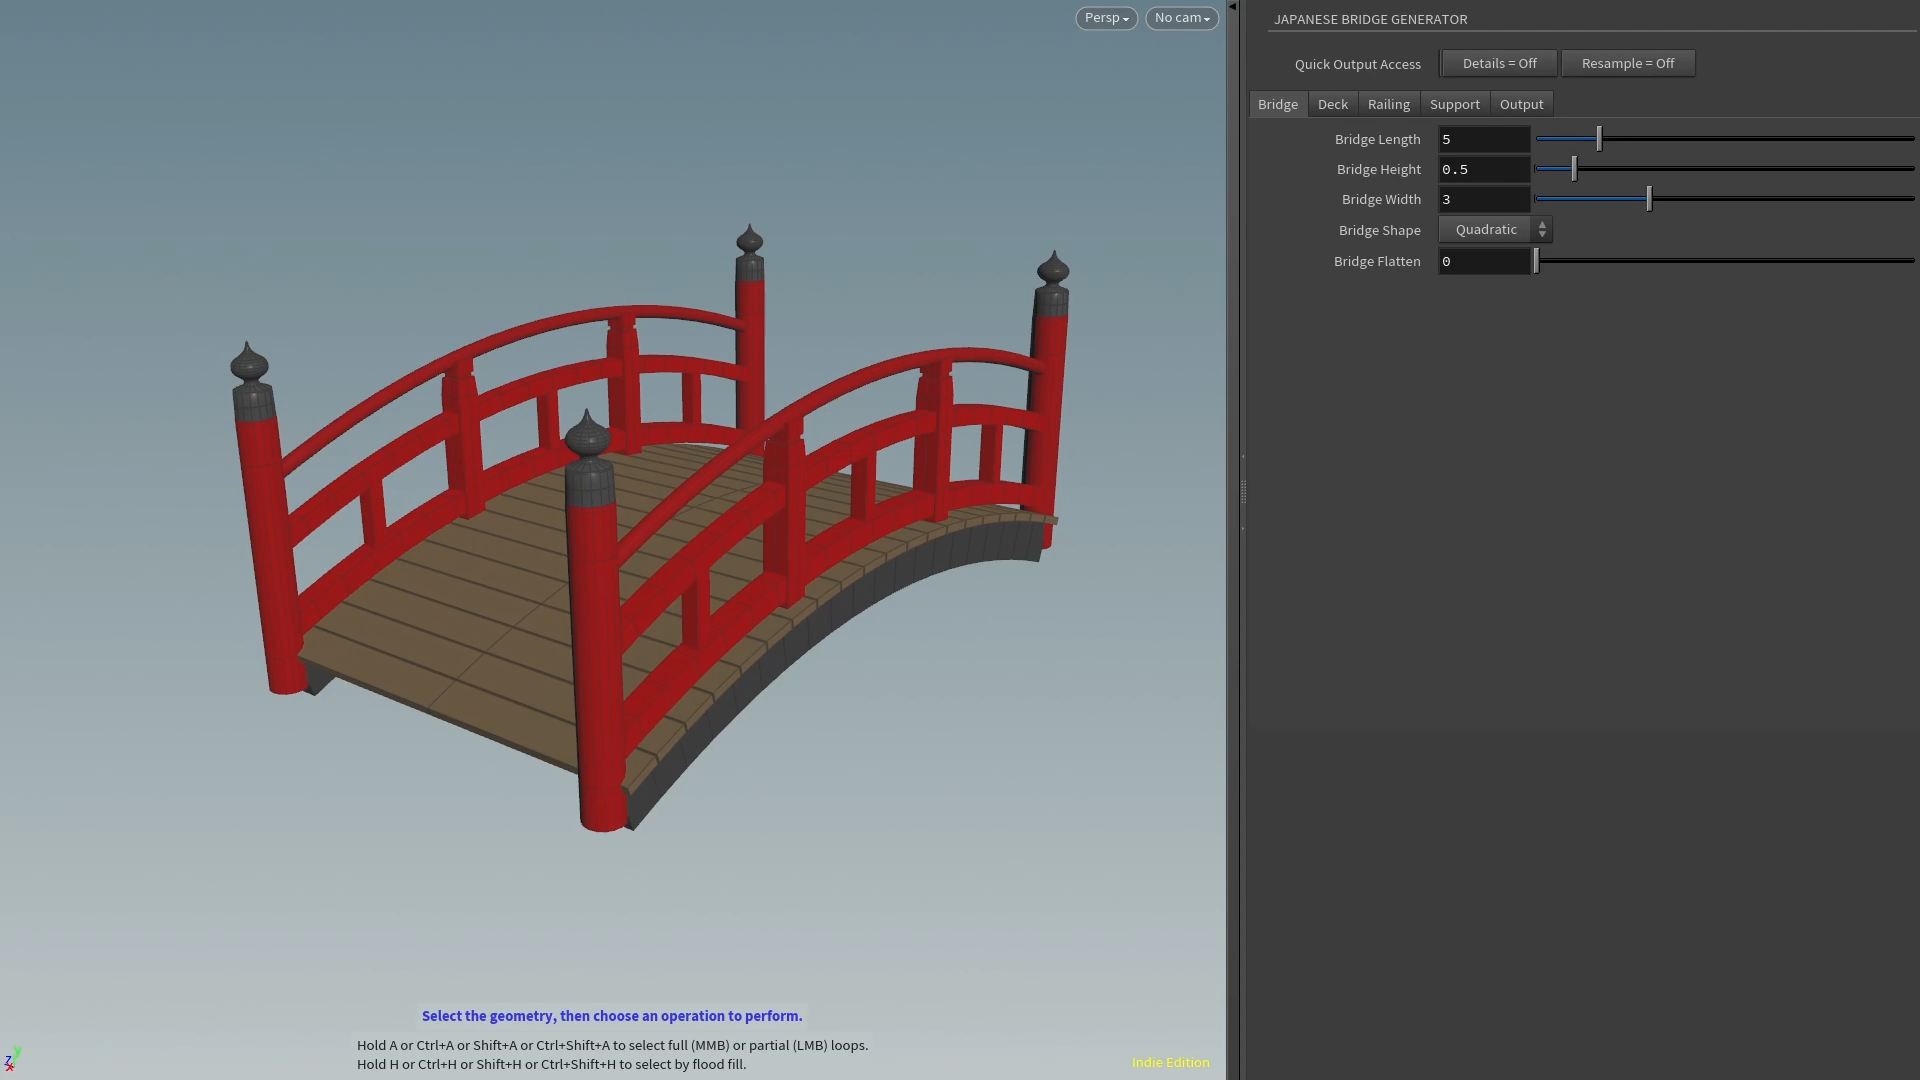
For the procedural modeling assignment of the course I decided to build a Japanese Bridge Generator, partly because of the nice touch it would add to the final project, partly because it could also be a handy tool to have in combination with my Japanese Pagoda Generator. The video below shows my first version for the Japanese Bridge Generator, as I used it for generating the bridges in this project.
To give some background on my approach for building procedural modeling tools in Houdini, my first personal guideline is to never start building a tool without a proper reference board. Second, I always try to build a tool on top of a set of construction curves and shapes, which prevents you from creating too much consecutive dependencies that will start to work against you at some point. Instead, for each element you can now fall back on the same (very basic) construction curves and shapes that are easy to control, and this also makes your node network a lot cleaner. Lastly, my third personal guideline is to start creating control parameters in a CTRLS (null) node right away. This forces you to design the tool with logical controls in mind, makes visualizing dependencies very straightforward and it also makes it very easy to promote these control parameters as soon as you want to turn your tool into an HDA.
To shape the environment for this project, I created a 75x75m landscape with some basic heightfield operations. My idea was to create a series of water basins wherein a small basin overflows into a deep and bigger reservoir created by a dam. Next the water also slightly overflows the dam into an even lower and bigger basin, but as the dam is blown up the entire reservoir flushes into the third basin. Additionally the bridge destructions should build up the tension in anticipation of the larger explosion.
Besides creating an interesting shape, I kept the landscape very simple because I wanted to focus on the simulations for this project and not on the environment. One thing that was very important though, is that the landscape couldn’t be just a surface but had to be a water tight shape, because it needed to be converted into a collider volume for the other simulations to bounce off of.
FRACTURING
In order to destroy the bridges and blow up the dam in 3d, the models needed to be fractured in advance in a way that would look natural in combination with the way of destruction. Therefore, for the dam I used Voronoi fracturing based on multiple layers of point clouds with varying densities to create extra small pieces in the area where the cannon ball hits and the explosion originates. Besides the variation in piece size, I kept the shape of the fractured dam pieces quite simple and left further detailing for another occasion. For the bridges I’ve used the RBD Material Fracture node set to ‘wood’ to create a splintered way of fracturing that is more natural for wooden objects. Also in this case, I decided to leave out further detailing to keep focus on the overall goal of the project. The only detail I added for both dam and bridges, is different materials for inside and outside surfaces. This adds more realism to and improves readability of the fractured assets when they are destroyed.
Basic Voronoi Fracturing
Basic RBD Material Fracturing
SIMULATION
For setting up the simulation I started with the water sim to make sure both waterfalls had the desired look before I started experimenting with any type of destruction. First I derived the water body shapes from the landscape and dam geometry and the desired water levels. These water body shapes form the basis for generating the initial particle fluid that is used for simulating the water. Then I added a water emitter in the upper basin to prevent the water level from dropping, and used 150 frames of warm-up time to make the water reach a stable flow through the basins before starting any other simulation.
After I was satisfied with the behavior of the water, the second step was to setup and test the rigid body simulations. For the destruction I imagined big concrete cannon balls to be shot at the bridges and dam from all sides of the landscape. To land these cannon balls where I wanted them to land, I played with their initial position, velocity, direction, weight and the moment of switching from their animated to their simulated state. After some fine-tuning for all parameters involved this resulted in the bridges being destroyed in an appealing way, as well as damaging the dam and later giving it the final blow that would cause the big explosion.
The third step was to set this explosion up using a pyro simulation. Since I had already fine-tuned the moments of impact for all cannon balls, it was easiest to just start the pyro sim on the moment of impact for the last cannon ball. With a pyro source volume in place under water behind the dam, I ran various test sims at low resolution with not only pyro but also flip and rbd’s included to get the right look for the expanding explosion as well as the desired movement for the water and the dam fragments.
Next I gave the dam destruction some extra realism by adding a debris particle simulation on top. The particles are emitted from the edges of the pieces breaking off the dam. So the first cannon ball hit would only cause a small flow of debris falling down, while the explosion would cause a lot of particles being blown away along with the dam fragments.
Finally with all these simulations in place I wanted to enhance the look of the water by adding secondary effects such as spray, foam, and bubbles. This whitewater simulation can be created on top of a flip simulation where whitewater particles are generated based on several criteria including fluid acceleration, curvature, and vorticity.
The network below shows how the AutoDopNetwork is setup for all of these simulations working together. The video shows a flipbook preview for the entire simulation including warm-up time (but before I added the whitewater simulation).

RENDERING
During the stage of setting up individual simulations, its common to do low resolution sims or only run tests on small sections of the simulation volume. But especially for the water simulation the particle separation for example has a huge effect on the final look of the water (as well as on the simulation times). So while during the initial stage flipbooks are good enough to judge a simulation, for the final look it’s inevitable to create a proper cache for all simulations. Because my simulations were working together and influencing each other, this appeared to be kind of complex. Luckily I found out Houdini has a brilliant system for this: ROP hierarchies. Using this system you setup cache write and read nodes throughout your SOP network like you would with individual simulations, but at the same time you setup another instance of these cache write nodes in a separate ropnet or in the out context. And by organizing these cache nodes hierarchically here and telling Houdini in which order they should be executed, you can cache all of the sims together in one big run. Super handy and powerful! The node networks below give an impression of how I set this up. In the end it took about 30 hours to create the 268 GB cache for this simulation.
With caches in place, I moved on to do test renders in Mantra for some style frames throughout the shot. This final stage is all about really making the simulations come to life by setting up and fine-tuning materials, lights and cameras. While setting up proper materials for these simulations can be a study in itself, I’m quite happy with how I got them to look (see the final render below). Because Mantra appeared to be very slow, I only rendered the style frames in full HD at a low noise level, and saved a lot of time by rendering the entire simulation at half HD with a significantly higher noise level.
CLOSING WORDS
The course has taught me a lot about Houdini FX tools I had never used before, but working on the final project also confirmed that simulation can be very frustrating at times. At several stages of setting up this simulation, I had intermediate results I was really happy with, that in later stages would behave slightly different. In those cases trying to reproduce those intermediate results was really time consuming if not impossible.
So while FX simulation will probably not become my specialty, knowing my way around the Houdini FX tools can come in really handy for building all kinds of assets for (realtime) 3D environments. In the coming year I will certainly start doing more research into height fields, volumes, fracturing and Vellum to find out how these techniques can help me build better tools for procedural modeling and environment generation. Stay tuned!